Showing posts with label Makeup tutorial. Show all posts

Monday, August 22, 2016

The Victoria Beckham First Ever Makeup Tutorial - The London Look

I love her.

Victoria Beckham's has paired up with (my least favorite makeup brand, but whatever) makeup monolith Estée Lauder for a limited edition collaboration.
Maybe this is a precursor to a Victoria Beckham makeup line? If she does one it would be fabulous - all glory skin, subtly smoky eyes.

Anyway, with her Estée Lauder gig debuting in September VB has made a makeup tutorial video showing her "London Look".

Did I mention that I love her??

Check it out below:


Tuesday, May 19, 2015

Charlotte Tilbury Cannes Film Festival Looks

Superstar makeup artist Charlotte Tilbury created stunning red carpet makeup looks for Sienna Miller and Miranda Kerr in Cannes this week.

Stunning, non?
Charlotte has tutorials and a product guide for each look on her website. Check them out here: Cannes Film Festival Looks 2015

Personally I can't wait to get my hands on Matte Revolution Lipstick in Bond Girl and Walk Of Shame!

Charlotte Tilbury Looks Campaign

Friday, February 13, 2015

Valentine's Day Lip Love

Valentine’s Day Lip Love

Valentine’s Day – the official holiday of smooching - is nearly here, so it’s time to think about your luscious lip plan.

Today I am giving you 3 date night lip options combined with a little color theory class, breaking down some color options for those of you with a cool complexion and those of you with warm undertones.
Read on and pucker up!

Valentine's lip number one is for those of you who don’t want to do a big lip, but feel like more than just chapstick. Try using a lipliner to shape your kisser, and top it off with a colored lip gloss. In these images we've left the liner where you can see it, but in real life blend through it with your lip brush and make it invisible.

Valentines-Day-Lips-1


Icy and pink glosses look fabulous on girls with a cool toned complexion, while soft peachy tones are beautiful on a warm toned girl.

Valentines-Day-Lips-2

Valentine's lip number two is all about your pink game. Moving into a full lipstick our warm undertone gets a lovely coral based pink which compliments the olives and golds in her skin.

Valentines-Day-Lips-3


Our cool undertone model got a blue based pink, breathing magic into her complexion and making her teeth look super white.

Valentines-Day-Lips-4

Valentine's lip number three is a feisty bold red lip – the ultimate Valentine’s lip! Girls with a cool toned complexion look amazing in a blue based red, 

Valentines-Day-Lips-5


while warm toned girls are best in a true red or an orange based red. (pictured here in a true red).

Valentines-Day-Lips-6

The lip models in this story were actually 2 of my makeup assistants! Whitney is our cool toned girl, and Therese is my warm complected model. 
Here are a couple of bts shots.

Valentines-Day-Lips
Therese in the makeup room getting a soft, glossy lip


Valentines-Day-Lips
Whitney on set getting a muted red lip
This story was originally written for Phoenix Bride and Groom Magazine.
Check it out here:
Photography by Jessica Savidge www.SavidgePhotography.com
 Temptu


Thursday, February 12, 2015

3 Ways To Wear Red Lips This Valentine's Day

3 Ways To Wear Red Lips This Valentine’s Day

Valentine’s Day is best served with a bold red lip.
A red lip is sexy, it can be fierce, it demands attention, and it is the calling card of the vixen.
But if you are a girl who doesn't normally wear red the mere thought of that can be overwhelming! 
If a red lip seems scary, or feels like too much work, here are 3 easy ways  to slip into a sexy Valentine's rouged moue.


Valentines-Day-Red-Lips-3-Ways
lipliner and gloss


1.   Ease your way in to red by lightly coloring your entire lip with a red lipliner, then adding a clear gloss.

Valentines-Day-Red-Lips-3-Ways
lipliner and lipstick patted in with your finger

2.   Want something a little more substantial but still keeping it muted? Shape your lip with a red liner then pat a soft red lipstick on with your finger. You can control the intensity by tapping on a little more or a little less depending on your mood.
In the picture above we kept it super soft and subtle.


3.   Feeling a little more emboldened? 


Valentines-Day-Red-Lips-3-Ways
bold, matte, red lip

Try out a velvety matte red lip. Shiny red lips can slip and slide, and often men cringe at the thought of kissing them and getting it all over their face.
Matte is the easiest way to wear red as it doesn’t move or bleed and stays on your lip rather than your glass. Or your man.
And it's sexy.


Temptu

Looking for a new red lipstick?
Check out How To Choose Your Perfect Lip Color here
and The Best Red Lipsticks post here
I am also crazy about the new Temptu Color True red lipstick. Check it out in the link above.

The model in this story is my assistant Whitney, and all images were photographed by Jessica Savidge (www.SavidgePhotography.com)

If you liked this post please share it with your friends on your social media. (and join me on mine - see the sidebar on the right)
Also I would love to hear about your favorite red lipsticks! Drop me a line in the comments section below and tell me all about them!

Friday, November 21, 2014

How To Do Glitter Eyeshadow

The holiday season is here, which means party season is here too!


Glitter eye shadows are so fun to wear to winter festivities.
They look so vibrant and alive against the bleak, dreary backdrop of the colder months, and they also play well against crisp white snow.

How-To-Do-Glitter-Eyeshadow

Candle light and open fires pick up the sheen you've added to your shadow and make your eyes sparkle and look so pretty.

But if they're not executed correctly, glittery eye shadows are just a sparkly mess all over your face.

So here are my tips for 
How To Work With Glittery Eyeshadow.

1. Neutralize your complexion
To pull off a good glittery shadow you really need to have a good, smooth foundation, evening out your complexion. 

How-To-Do-Glitter-Eyeshadow

2. Keep The Shine Only To Your Eyes.
Its easy to make the whole face look too shiny when you have a high shine eye. Tone the cheek down a little, and don't add sparkle anywhere else. Sparkly or shimmery highlight paired with a glittery shadow will detract from the effect of the eye shadow and can end up making the face look oily.

3. Soften The Lip
If you are making a shimmery eye the focus of your look, help it out by toning down the lip. 
Most people can't carry off a big eye and a big lip at the same time. Go for something a little more neutral, and keep it either matte or just a low sheen. A big glossy lip with a glittery eye makes the face look too shiny and too busy.

How-To-Do-Glitter-Eyeshadow

4. Use Your Glitter Shadow As An Accent
Dont try to build your entire eye with a glitter shadow. 
Build the shape and drama of the eye in neutral creamy finished eye shadows (glitter adheres better to a cream base), and then bring in your shimmery/glittery product as the final event.
Bare lids won't hold sparkles.

How-To-Do-Glitter-Eyeshadow

5. It's all In The Application
To make this deal work, and not have glitter all over your face, you need to apply it correctly.
I like to dampen my brush by dabbing it into a tiny amount of Makeup Forever HD Primer (it binds and holds the product without being too heavy) and then pick up my glitter /shimmer product and gently press it onto the area I want to accent.
Don't try to paint the eye or sweep a glitter product over it, as the particles will flick all over the face and can be tricky to get off. You want to isolate the glitter/shimmer just to the eye, and the area of the eye that you are accenting.

How-To-Do-Glitter-Eyeshadow
Shimmer vs Glitter

6. Shimmer or Glitter?
I prefer a product that shimmers to a product that is super glittery. My favorites are Makeup Forever Star Powder and 
Face Atelier's Shimmer. The particles are smaller, give more of a shimmery effect, and stay on the eye rather than all over the face. You can carry off more sheen to other areas of the face with a shimmer shadow instead of a glitter.
If you want to use a glitter look for one with smaller instead of bigger particles.

7. Repair Job
If you wind up with particles of glitter on your face use a piece of sotch tape to gently lift it off


Tuesday, June 5, 2012

3 Quick Ways To Brighten Tired Eyes

There's no need to walk around looking sleep deprived.

Here are 3 quick tricks to wake up your tired looking eyes in an instant,
and leave you looking vibrant and gorgeous!


1. If you're the girl who likes to wear beige/taupe or neutral shadows:
abandon the flat mattes and use a shimmery version instead.
Or add a shimmer product,  
such as Makeup Forever Star Powder in #926
to the inner corner of the eyelid, and sweep it across
the inner 1/3 of the lid.
The tiniest touch of champagne beige shimmer
under the inner 1/3 of the lower lash line will wake your eye right up too!


2. If you're the girl who normally wears black or brown eyeliner:

Try a navy blue liner instead.

 
When you run a little navy blue under the lower lashes (and blend it) it will make bloodshot tired eyes look brighter


3. If you're the girl who prefers vivid eye shadow colors:

Try lavender eyeshadow.
Lavender is the most universally iris-brightening shade.
Avoid purples with a very deep blue base, stay lighter and fresher instead.
 

Tuesday, October 18, 2011

The Two Minute Rule

Girls are always telling me that their makeup doesn't last past lunchtime, or that their face resembles a gooey oil slick by mid morning.
As we go over their morning glam routine we generally find that they are using the right products, but that they're throwing them at their faces in a manic, high speed, borderline psychotic frenzy.
Thus, the not so hot, slimey mess.

So today we're going to talk about the  
Corinna B Beauty 101 Two Minute Rule 
(which can be shortened to 1 minute if you're really in a time pinch)

Anytime you are putting anything on your skin, whether it be a skin care product or a makeup product, you have to allow a little time for the love fest to begin. Your skin needs a chance to absorb the product, or to cosy up to it and make a union that binds. If you pile everything on at once you wind up with a colored skincare soup.

Now, as women we are born multi-taskers. Very few of us get the luxury of devoting uninterrupted time to the mirror each morning, so the Two Minute Rule actually incorporates into your morning routine quite easily.


Here's how it works:
If you use a serum in the morning, wait 2 minutes before applying your moisturizer and eye cream.
Easy, right?
Use that 2 minutes to go grab your coffee, make your bed - whatever else you are tasking before leaving for work.

2 minutes later put on your facial SPF


Wait for 2 minutes, then put on your primer. You have to let your primer settle and do its thing before you go racing in with concealers/color correctors/foundation

After 2 minutes put on your foundation. Make sure you apply your foundation sparingly - less is more, and give it a chance to set a little before powdering and moving on with your makeup.

If you're using a cream blush, apply before powder, but give it a couple of minutes to settle into your skin before you do powder it.

Once you're powdered, your two minute (1 minute in a pinch) spacing is done, and you can high speed through your eye makeup and what ever else you're doing.
Arizona Muse redefines fabulous
By allowing your skin a minute or two to absorb and work with each of the products you are using, and then powdering your wet makeup products to set them, your makeup will last all day, and look totally fabulous.

Wednesday, September 21, 2011

7 Tricks To Make Your Lips Look Younger

Women invest so much time, effort and money into looking youthful, but then blow it with their choice of lip color or lipstick formulation.
As you age you lose some of that lovely fatty texture of the upper lip, and the lip line itself starts to disappear, so you need to have a few tricks up your sleeve to keep your kisser looking ripe and delicious.
I'm giving you 7 of them...


7 Tricks To Make Your Lips Look Younger

1. Lose any brown lipstick or lipgloss that is darker than a caffe latte. 
Actually, apply the same theory to plum tones.
Dark lipstick makes lips look smaller, pursed and angry. And who wants that?? A dark mouth will also emphasize and dark rings under your eyes, and any blue undertones that are showing up in your skin.
So now you look tired and angry, and your skintone looks flat.


2. When Choosing Pinks go a shade or two lighter than your natural lip color.
But don't go with a pink that is too white - go with a warmer tone. A pink that is a couple of shades lighter than your natural lip color is instantly flattering and instantly youthful.

3. Avoid Mattes.
Typically matte lips can be really aging. As in really, really aging.
Occasionally you come across a hydrating matte lip, but for argument's sake, avoid mattes.They will just drag the life out of your skin, and make your lip look flat and dull. And who needs that??

4. Go for creamy, hydrating lipsticks
Pretty self explanatory. You don't want your lips to look dry - you want them to look juicy. And inviting.

5. Wear a lipstick/gloss combo
A plain, colorless gloss is no longer an option. Instead use a colored gloss, or a lipstick with a soft sheen to it. You need the depth of color under the gloss to make the lip look riper.
And while we are on the subject of glosses, choose your gloss wisely. Avoid anything too "porno glossy" as it will just make you look foolish. Avoid formulations that are gooey, tacky, thick or sticky. We just want a nice shimmery mouth.

6. The no lipstick look.
You need something on there, but if you're not a lipstick gal, try filling the lip in with a nude or pink nude liner, then applying a soft pink gloss over top. But not a sparkly gloss, a simple shimmery sheen to the lip looks gorgeous.

7. When in doubt go for a soft coral base
The softer coral based shades are both skin brightening and youthful.

Make sure you whiten your teeth too. Clean, white teeth are so pretty, and will make you look younger.

And then my personal motto:
At all times, and in all places, always be the first to smile!

Friday, September 2, 2011

5 Quick Tips To Keep Your Summer Makeup Looking Gorgeous

As we get to the end of summer you'll often find your skin has taken a beating from the heat, the sun, the wind, and is now looking less than lustrous.

Here are 5 Quick Tips To Keep Your Makeup Looking Gorgeous
image courtesy Clarins

Its all about the skin. If your complexion looks less than fab, your overall look suffers, so starting with your base:

1) Go a shade deeper with your foundation. 
Foundation that is too pale is very aging. Your skin will no doubt be a deeper tone than usual at the end of summer anyway, so adding some depth to your base will give you a glow and keep the pretty going.

2) Choose the right formula
Crushed mineral bases, matte formulas and oil frees are the absolute enemy. They'll make your skin look dried out and beat up. Instead opt for a light dewy formula, such as Makeup Forever Face and Body, or go for a well blended light application of a silicone based formula such as Makeup Forever HD Foundation or
Face Atelier Ultra Foundation. These will make your skin look fresh, healthy and give it a beautiful soft glow.

3) Blend like a pro
Every pro makeup artist will tell you its all about the blending. The key to natural looking makeup is to blend and blend and blend. Apply a small amount with a foundation brush, working in into the skin and through the jawline, or even better, invest in a beauty blender and get your sheerest, most blended finish ever.

4) Don't try to conceal crows feet
Chances are you've scored some extra fine lines around your eyes, from dehydration and squinting through the summer. Don't try and hide them with makeup - you'll just make them look worse. Instead load up on the eye cream, get them hydrated and keep foundation and concealer to a minimum around your eyes.

5) Give it a soft focus finish
When you're done with your makeup, take a damp sponge (beauty blender) and pat/bounce it over your T zone. This will lift away any excess, and leave you looking fresh and lovely.

Wednesday, August 24, 2011

ShiseidoShimmering Cream Eyeshadows

These look delicious.
I haven't worked with them yet, but can't wait to get my hands on the new Shiseido Shimmering Cream Eye Shadows


These are lightweight cream eye shadows with a radiant lustrous finish. 
Apparently they last and look fresh for 16 hours.
And, I'm told, they hydrate the skin with a Super Hydro-Wrap with Vitalizing DE.
Not entirely sure what that is, but it sounds good!

Check out this little tutorial with the ever brilliant Dick Page


Monday, August 15, 2011

5 Steps To Luscious Lips

Want your lips to look ultra lush and kissable?
Angelina Jolie and her world famous lips

Here are 5 Steps To Luscious Lips

1.) Exfoliate - gently!
Before you do anything else, gently exfoliate the dead skin from the surface of your lips.
Use an organic lip scrub such as Lip Tea Scrub from H.Wood Beauty, a wash cloth or a soft bristled toothbrush.

2.) Lip Balm
Use lip balm every night before bed, and first thing in the morning to help protect and hydrate the lip.
Any time you exfoliate your lips follow up with lip balm, and let it soak in before going to the next step.

3.) Use A Lip Primer
Dab on either a silicone gel or a cream primer to help fill in the lines around the lip and to keep your lips looking smooth.

4.) Liner
With a pencil the same color as your natural lip color, trace your mouth, starting in the middle and working your way out to the corners, using a lighter hand as you work your way out. Next fill your lip in with the pencil, using it as your color base.

5.) Color
Avoid pale or frosty shades and nudes that match your skin or are paler than your skin. If going for a flesh tone opt for a shade that has a little pink to it, and a little more depth than your own skin tone.
Dark shades will may your lips look small, overly matte finishes will make your lips look dry. Instead choose lipcolors with a sheen to them. Grapes and raspberries always look luscious and have sufficient blue undertones to really make your teeth look white.
Orange based lip color tends to make teeth look yellow.
Feeling tired? A bold pink or fuchsia will add an instant pop of life to your complexion.

Wednesday, August 10, 2011

Top 4 Makeup Mistakes That Make You Look Older

Want to look a little more youthful?

Here are 4 major makeup mistakes that age you like crazy!!

1. Wearing dark, matte shades.
As a rule dark colors on your eyes, cheeks and/or lips make everything look sunken in and smaller. Avoid using anything too matte. Flat, matte shadows make eyes look tired, and unless your lips are well hydrated, matte lipsticks can leave your lips looking withered and pursed.
image source anorak.co.uk
Opt for lighter colors with a sheen to them.

2. Too Much Powder
image source infobarrel.com

Translucent powder is great for setting foundation, but worn alone or overdone it sits in your fine lines and wrinkles and makes you look washed out, tired and a bit ashen. It has no warmth to it, and is the absolute devil when you are trying to look young(er) and fresh faced.
Ideally you want your skin to look a little dewy and luminous.

3.Straight Lines
Charlize Theron looking luscious

Harsh, straight lines and edges are sooo unflattering and aging! Hard lines drawn around eyes and lips just make the features look smaller, and leave you looking angry. Smudge out your eyeliner a little, and blend your lipliner inward for a much softer, prettier effect.

4. Too Bronze!
Remember Magda in "Something About Mary"??
As you age you lose some of the peachy pink skin tone, and your complexion gets a little yellower, a little sallower. Be careful of completely flat bronzers, and bronzers that are too yellow, or too dark. Look for bronzers with a champagne-rose or peachy-apricot undertone, and a very slight (read very slight) shimmer to them. They will liven your complexion back up and infuse some warmth.
Kim Kardashian tends to get the bronzer issue just right.

Tuesday, July 26, 2011

Waterproof mascara

Well it's that time of the year again. The only time of the year that I'm OK with waterproof mascara. As a rule I'm not a big fan.

Overuse of waterproof mascara can lead to broken lashes and thinning lashes. I can normally spot an habitual waterproof user the minute they sit down in my makeup chair.

But at this time of year, walking through that thick custard of humidity, you kinda need the stuff.
Or if you're into swimming whilst still looking glamorous. Or marrying a philandering Monegasque prince against your better judgement - there are actually valid reasons for wearing waterproof mascara.
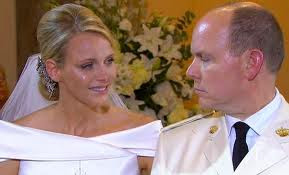
Her Serene Highness Princess Charlene and Prince Albert of Monaco. Which one looks more miserable?? 


The problem is that it's not the kindest product to use on your lashes. And if you don't remove it properly, it's not the kindest product to the delicate skin around our eyes.

So here's how to do it:

   * Use a really good eye makeup remover.
This is crucial. You need to make sure that every last trace of waterproof mascara is removed, everytime you wear it.

My personal favorite, and the product I actually use both on myself and in my makeup kit is SensEyes from Makeup Forever.
SensEyes not only dissolves all traces of makeup, but as the name indicates, it is perfect for even the most sensitive skin and eyes.
(A cool side benefit of Senseyes is that you can use it to remove any stubborn makeup, including deep red and berry lipstains etc)
Lancome Bi-Facial is another good option. I like the oiliness of it.

If you can't afford, or don't have a good eye makeup remover on hand, use good old fashioned baby oil.


* Use It Properly

The whole idea is to a) dissolve the mascara and b) not rough up the delicate skin around the eye.
Soak a cotton ball or cotton pad with the product, then hold it against your closed eye for a couple of minutes so that it can work on the dissolving part. The more stubborn the mascara, the longer you need to keep it there.
Once the mascara has been dissolved you can gently (read: gently) sweep away any product residue.
Do rub or scrub. And ideally work from the outer eye in toward the nose so that you are not inadvertently stretching and pulling the skin and fast tracking yourself to looking 100.
If needed dampen a Q tip with eye makeup remover and work it through any remaining mascara.

*Use An Eye Treament Product

Once all eye makeup is removed give your eye area some extra lovin with a super gentle, extra hydrating and soothing eye cream.
If the waterproof mascara has irritated your eye, sooth it with some eye drops.

Finally, if you are venturing into the waterproof arena, firstly decide if you really do need a waterproof mascara, or if a water resistant mascara will work instead. If waterproof is absolutely the way to go, invest in a good one. Instead of a drug store mascara spend an extra few dollars and get a quality mascara. There are plenty around that wont break the bank - or your lashes!